Overview #
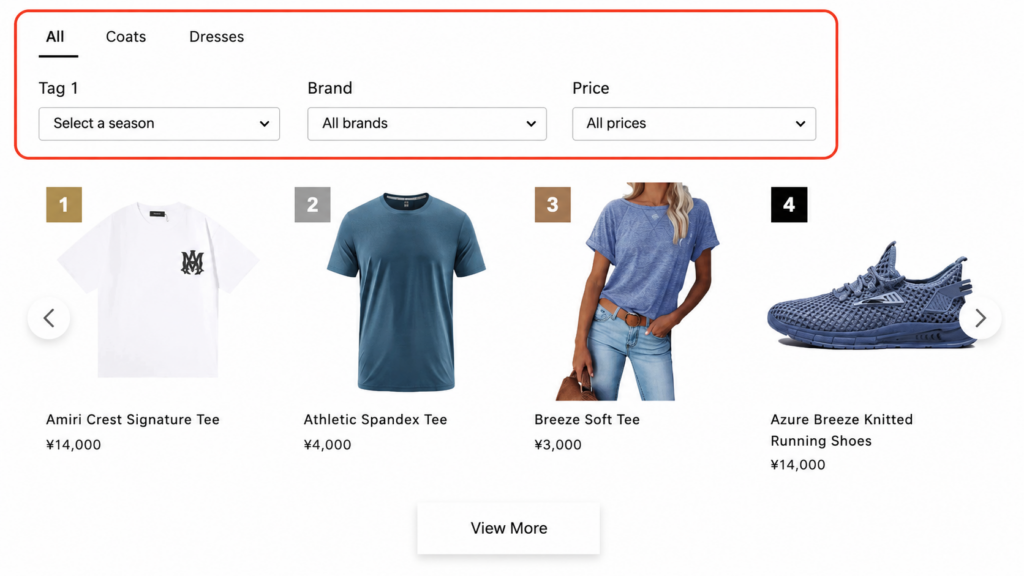
Rank King allows you to add filters to your ranking section, enabling customers to quickly narrow down the displayed products.
Filters can be displayed as either dropdown menus or tabs, and can be created based on:
- Product Tags
- Product Type
- Vendor
- Price
Displaying filters is optional. If you choose not to display filters on your storefront, no filter configuration is required.
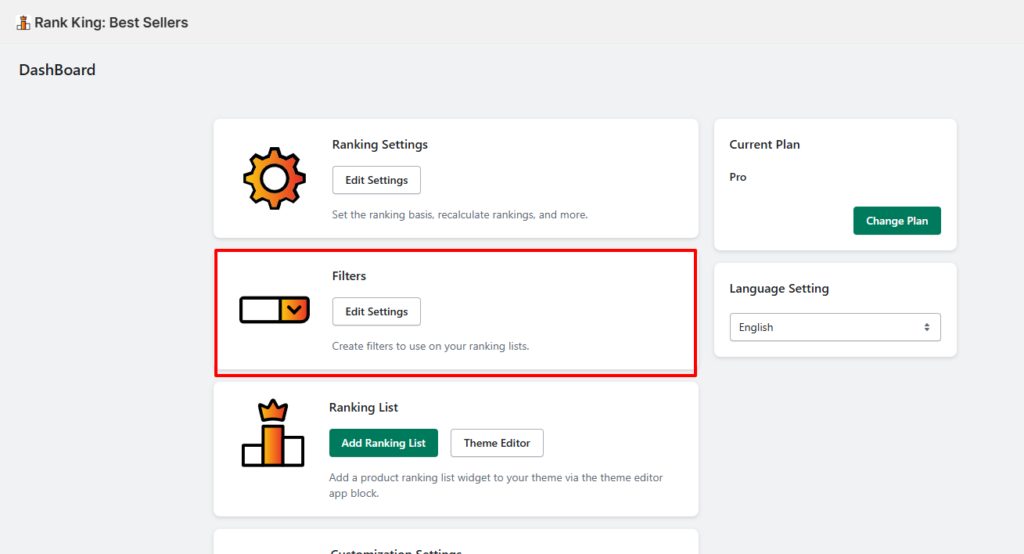
By default, Rank King includes four filter types
Contents #
1. Configure Filters #
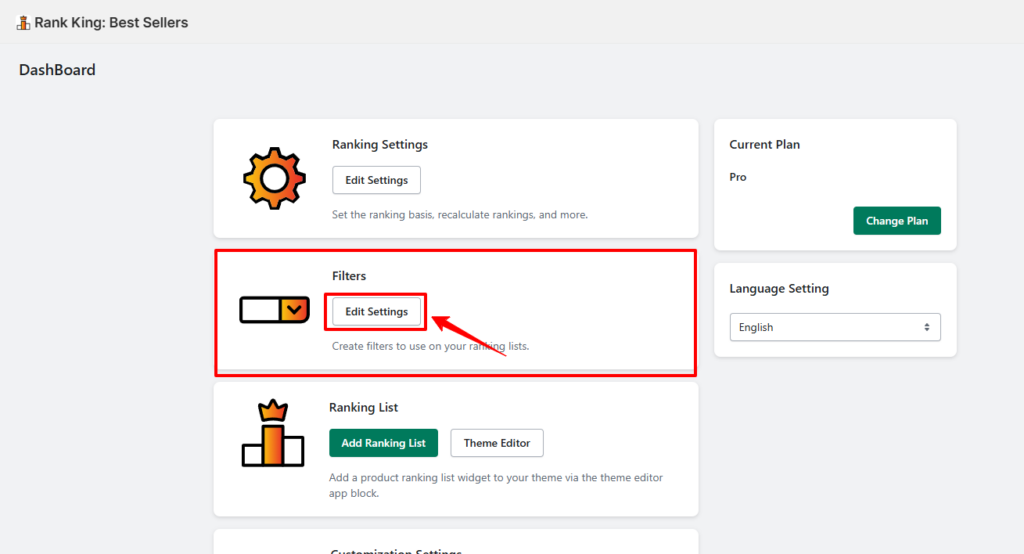
Open the filter settings.
Go to: Rank King → Filters → Edit Settings
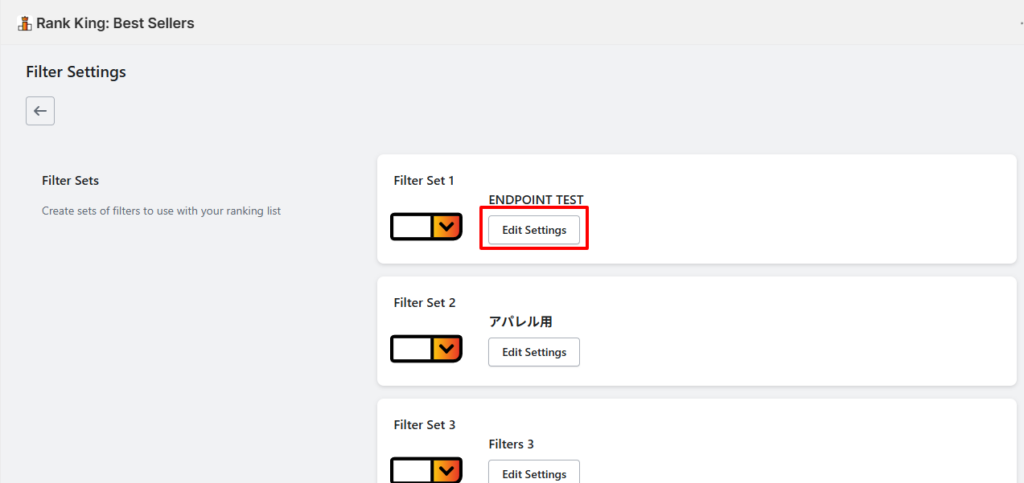
Select one of the available filter sets.
*You can create up to five filter sets.For example, you might create different filter sets for:
- Standard Storefront
- Sale Campaigns
- Seasonal Promotions
These filter sets can be switched in the Shopify Theme Editor.
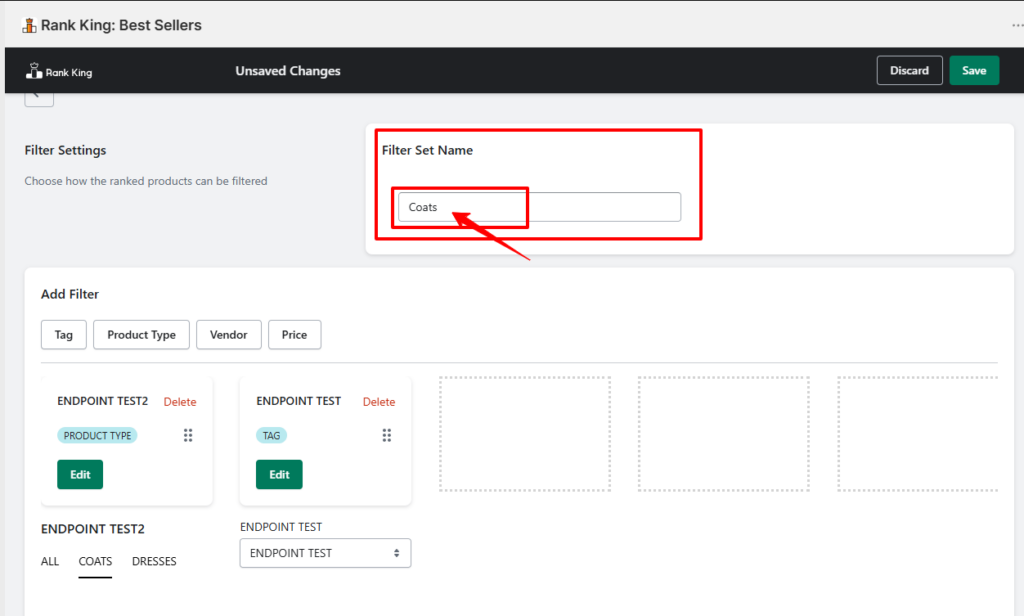
Filter Name #
Enter a Filter Name.
This name is only used within the Rank King admin and is not displayed to customers.
2. Create Filters #
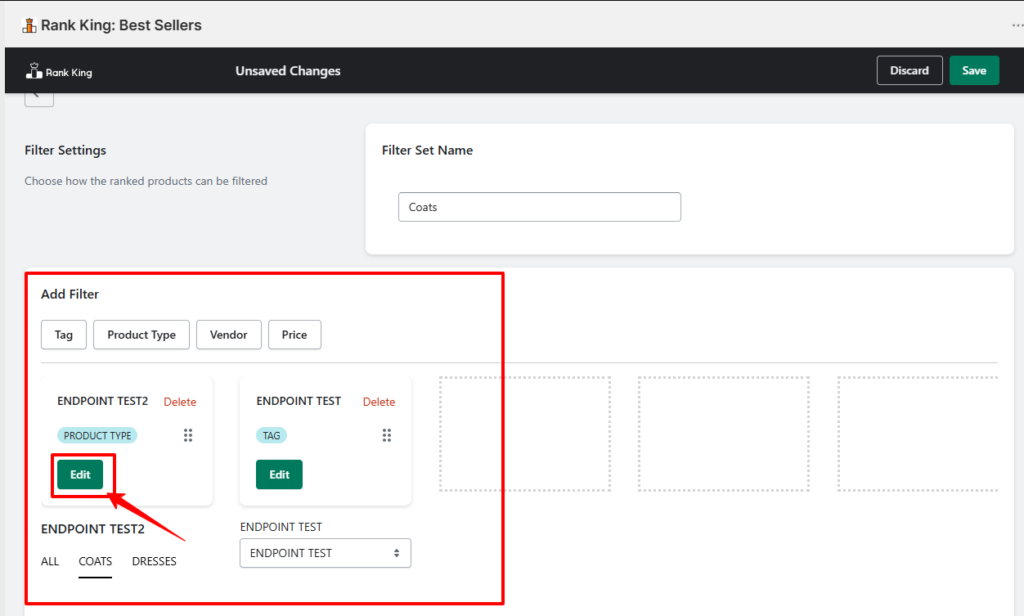
Rank King supports four filter types:
- Tags
- Product Type
- Vendor
- Price
Each filter type shares the same basic configuration.
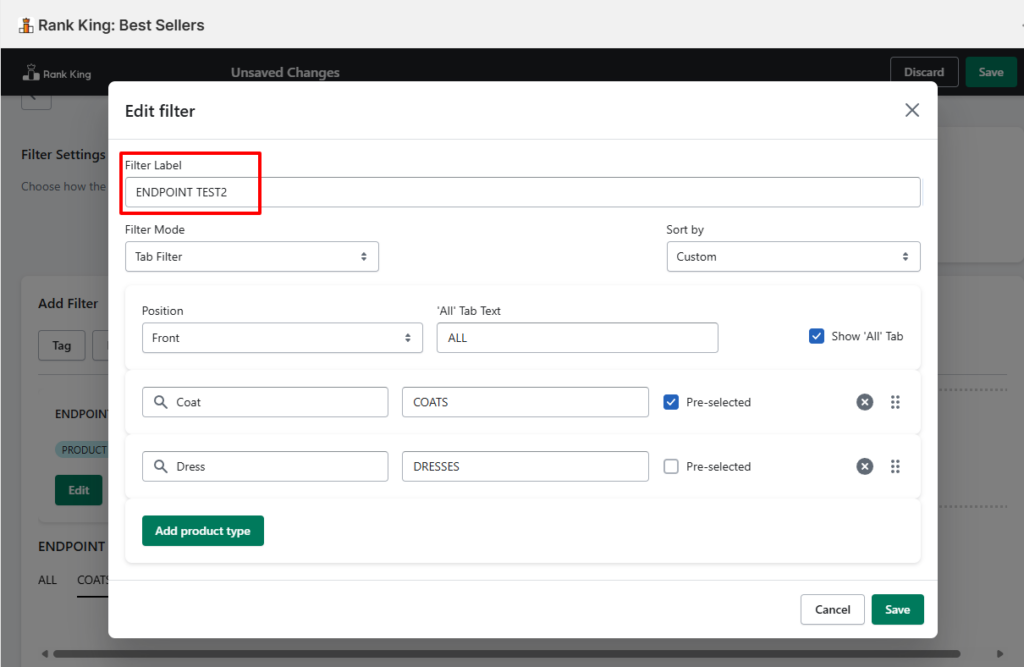
Step 1 – Filter Label #
Enter a Filter Label.
This label is used only within the Rank King admin to help identify the filter.
Step 2 – Filter Display Mode #
Choose one of the following display styles:
- Dropdown Filter
- Tab Filter
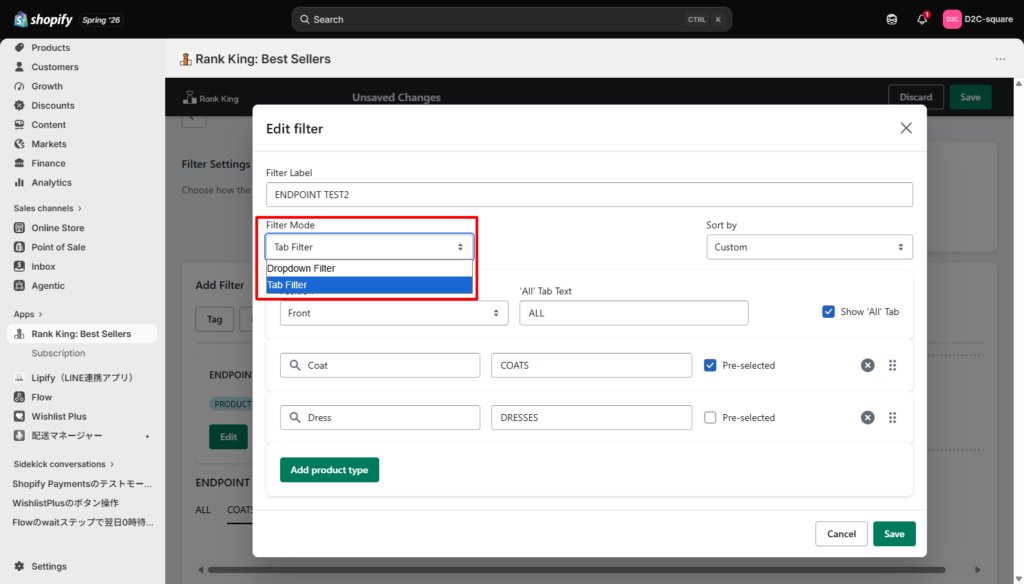
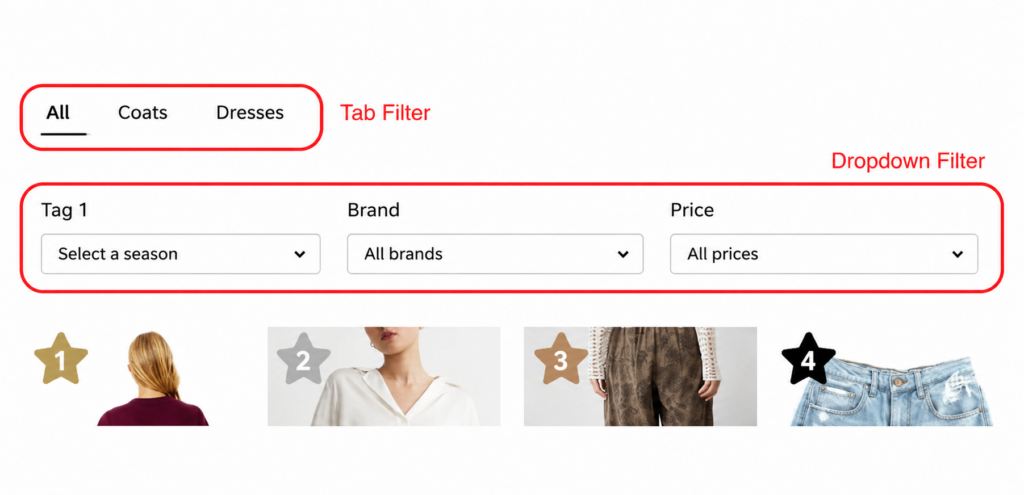
The difference between Tab filter and Dropdown filter.
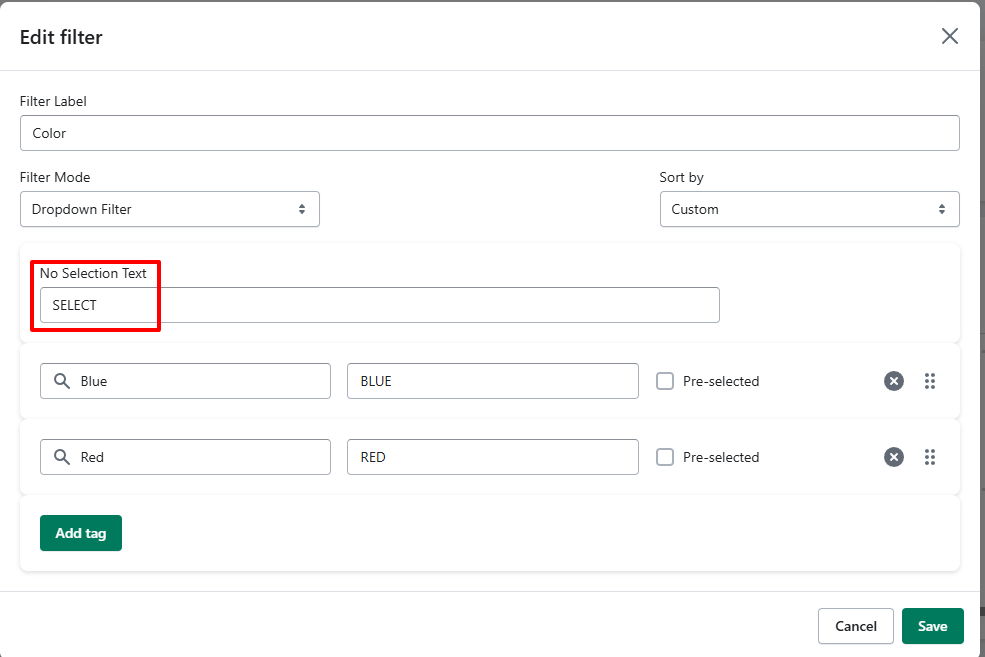
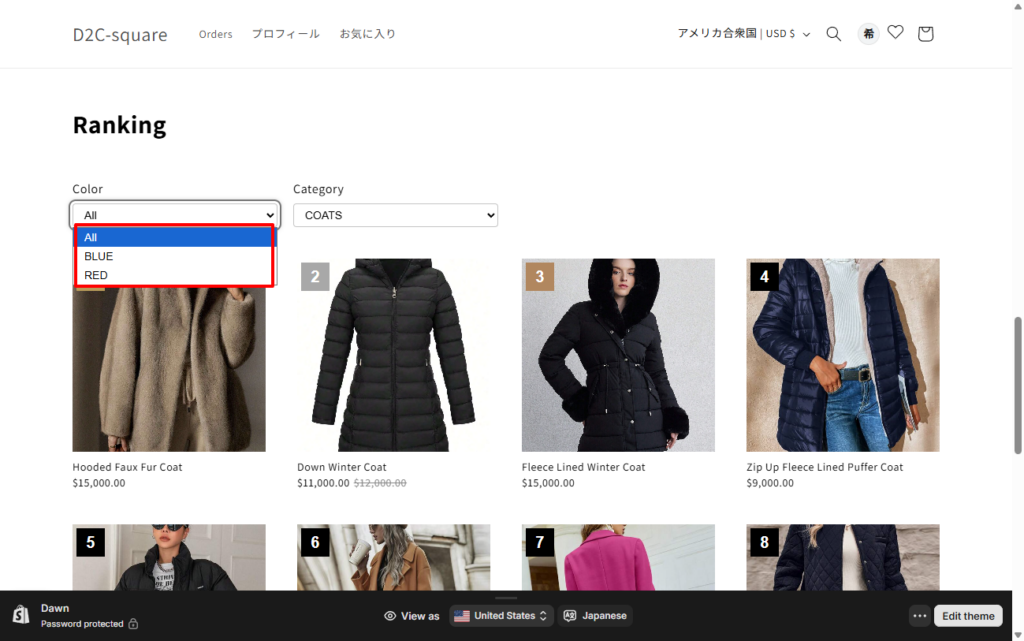
Dropdown Filter #
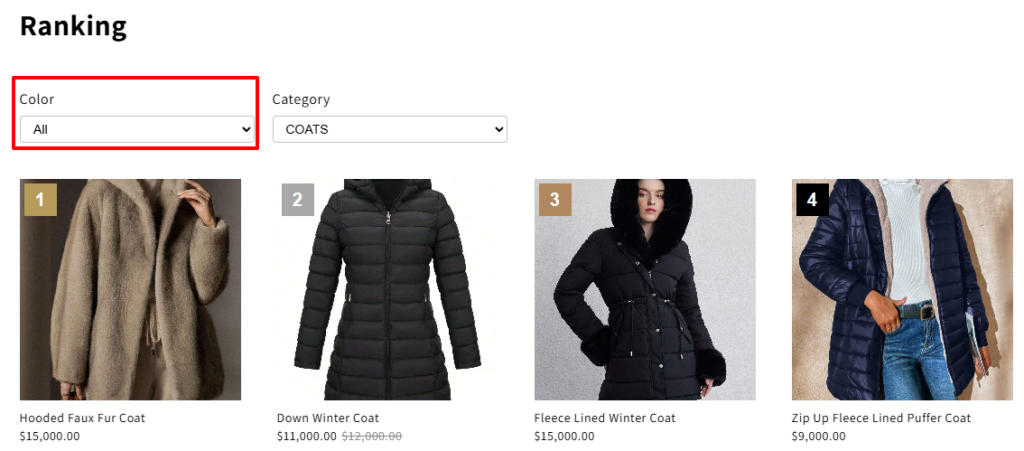
Configure the Default Text, which is shown when no filter has been selected.
Examples:
- All Products
- Select a Category
- Choose a Filter
This option is also displayed after the customer resets the filter.
Site design↓
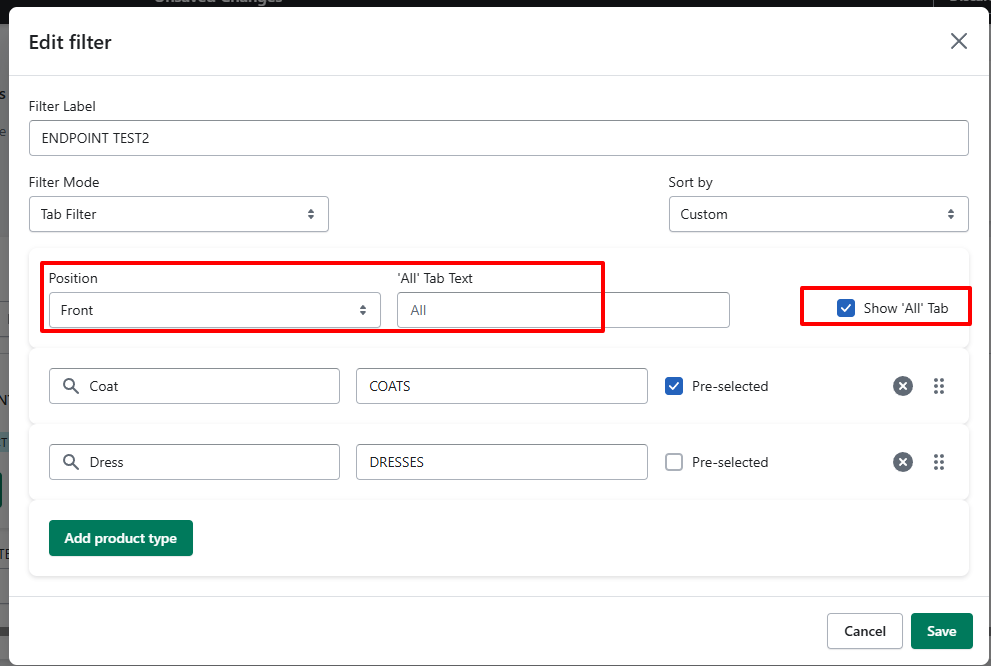
Tab Filter #
Configure:
- Tab Position
- First (Left)
- Last (Right)
- “All” Tab Label
This is the text displayed when all products are shown.
You can also choose whether to display or hide the All tab.
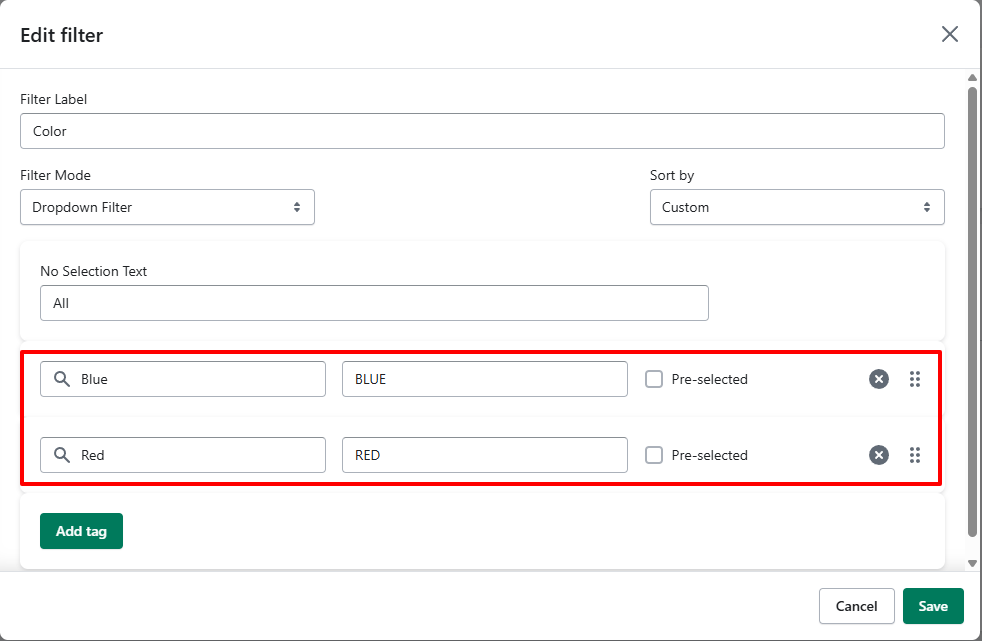
Step 3 – Add Tags #
Click Select Tags.
Choose one or more Shopify product tags.
For each tag, enter an Option Label, which is the text displayed to customers.
Site Design↓
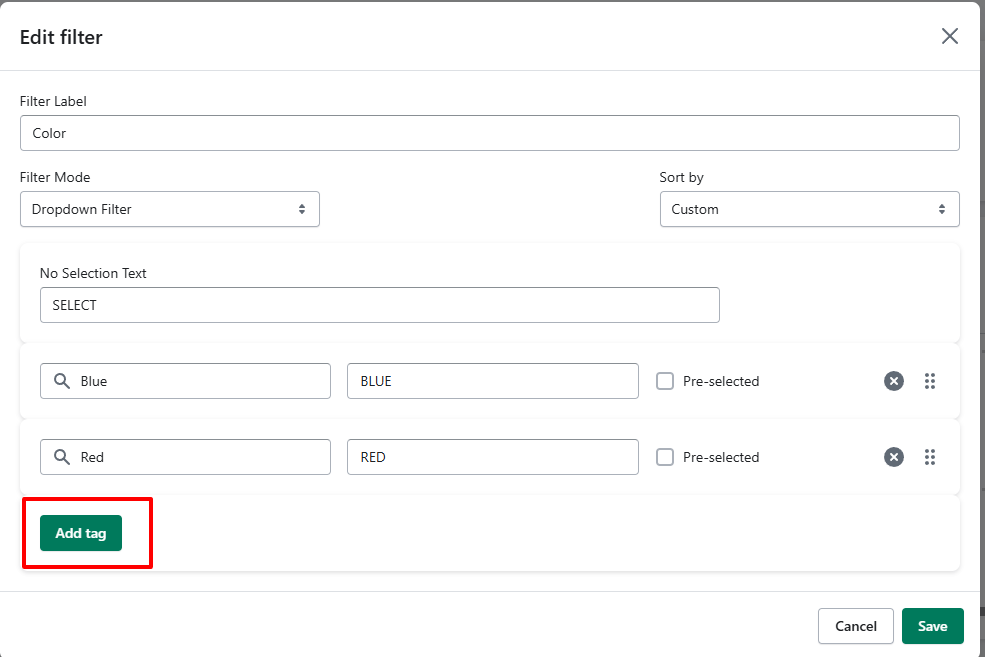
Step 4 – Add Additional Tags #
Click Add Tag to include more filter options.
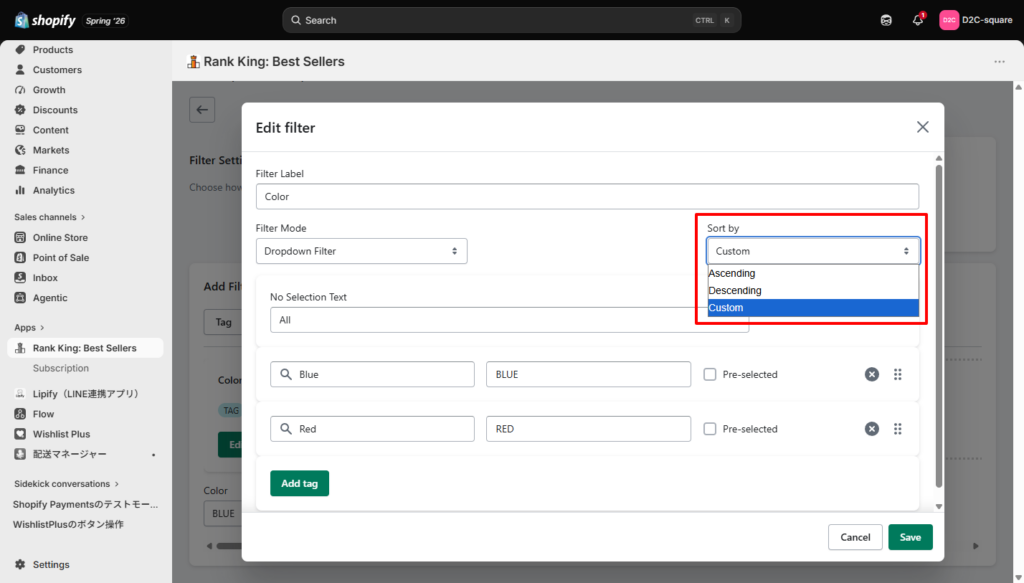
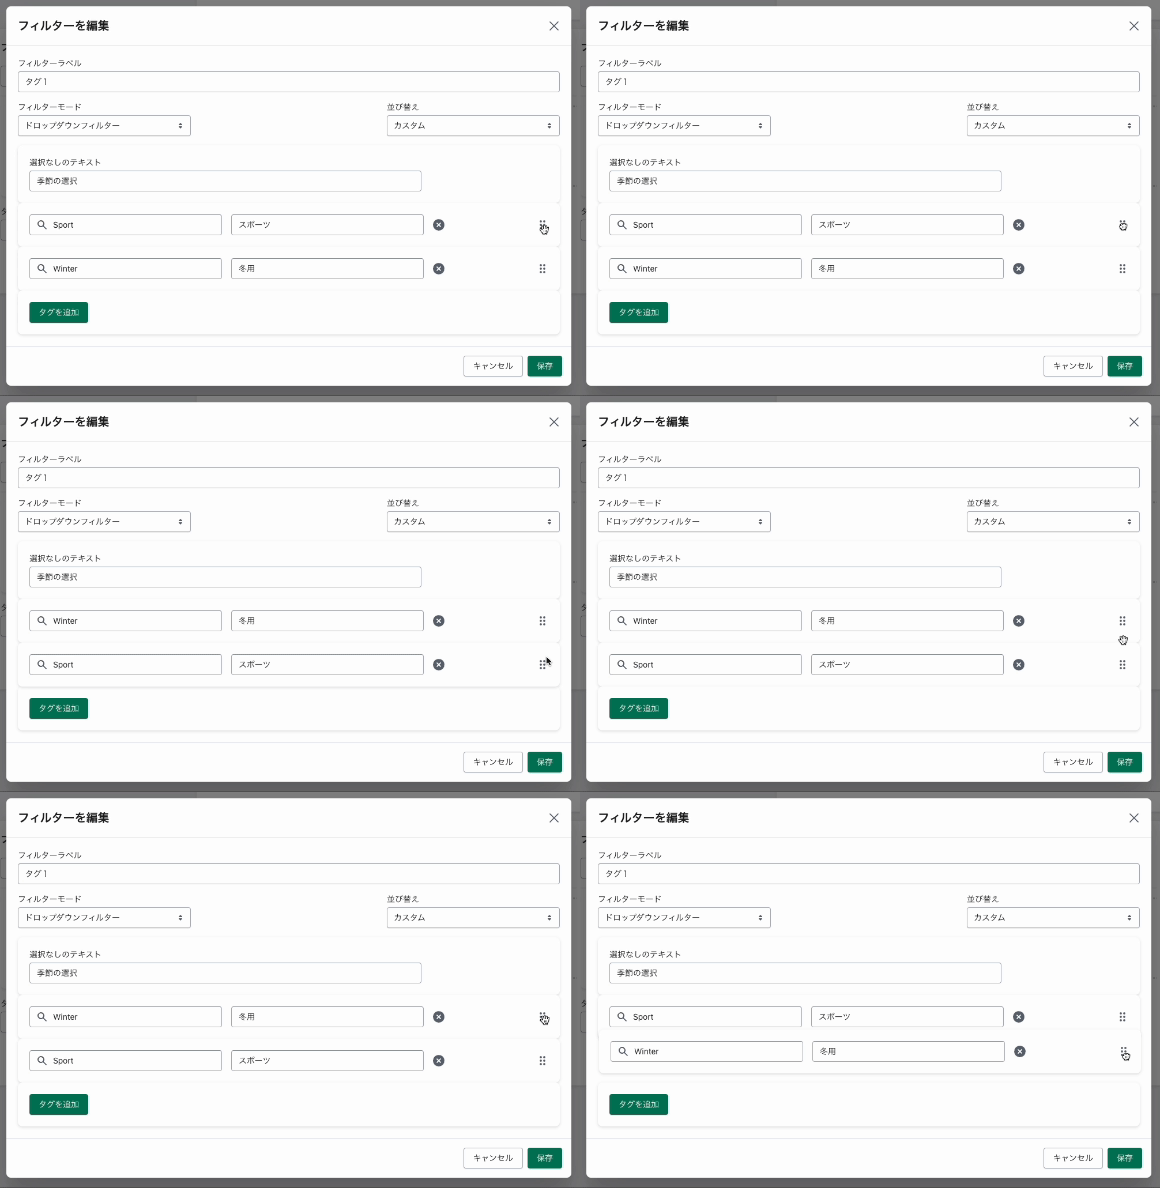
Step 5 – Sort Filter Options #
Choose how filter options should be ordered.
Available sorting methods include:
- Ascending
- Descending
- Custom
When Custom is selected, you can drag and drop filter options into any order.
Dropdown filters are displayed from top to bottom.
Tab filters are displayed from left to right.
2.2 Product Type Filters #
Open the default Product Type filter.
The settings for:
- Filter Label
- Filter Mode
- Sorting
are identical to the Tag filter.
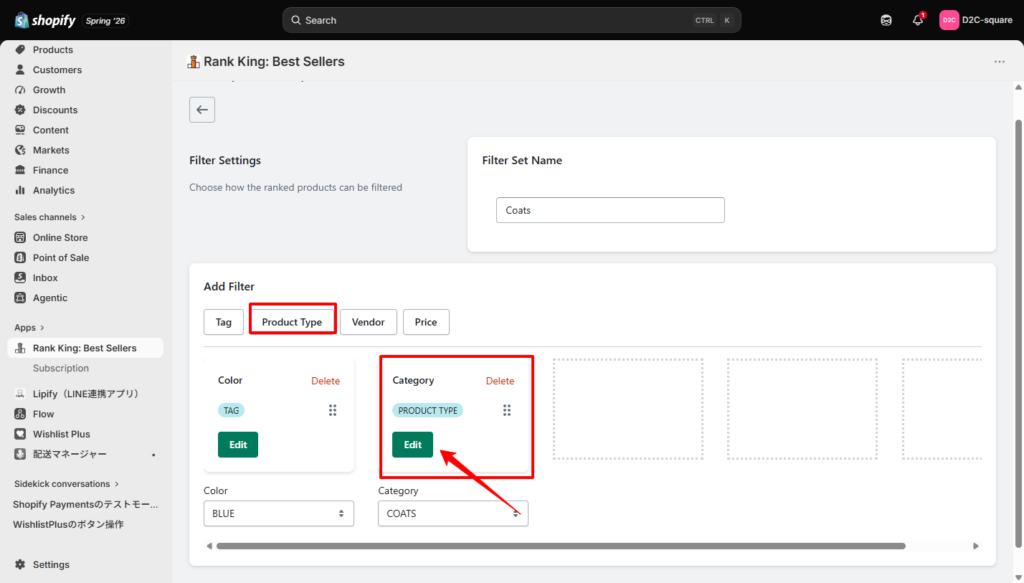
Click Select Product Types, choose the product types from your Shopify store, and enter an Option Label for each one.
Click Add Product Type to create additional filter options.
2.3 Vendor Filters #
Open the default Vendor filter.
Configure the vendor options using the same workflow.
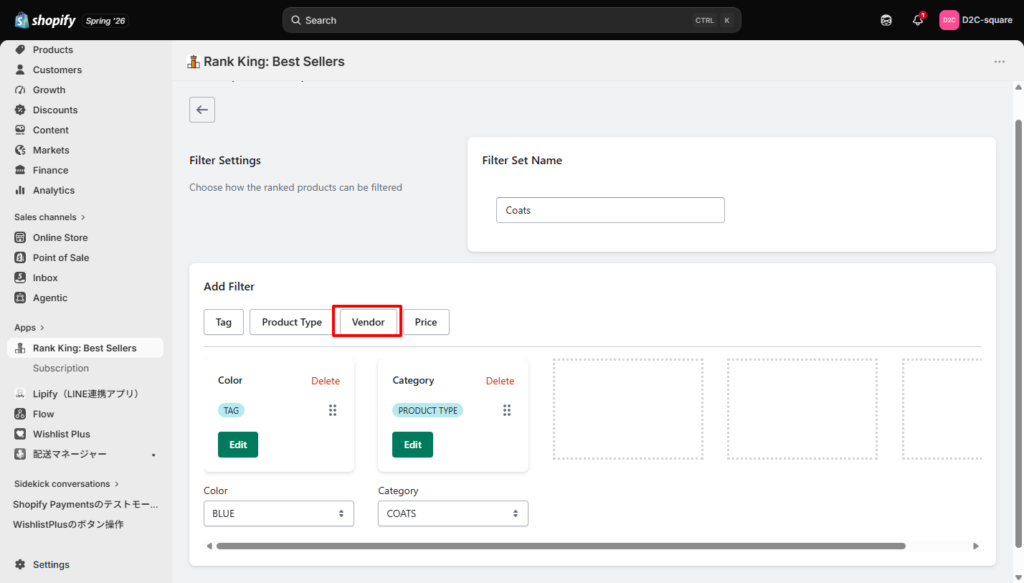
Click Select Vendors, choose one or more vendors, and enter an Option Label for each.
Click Add Vendor to add additional vendor filters.
2.4 Price Filters #
Open the default Price filter.
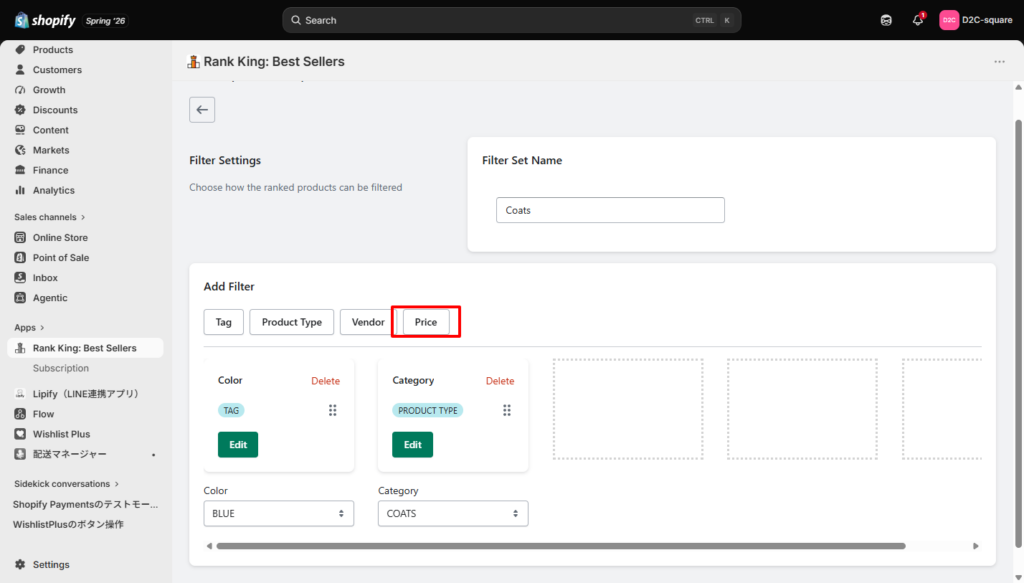
Configure each price range by entering:
- Minimum Price
- Maximum Price
- Option Label
Example:
- Under $50
- $50–$100
- Over $100
Click Add Price Range to create additional price filters.
2.5 Create Additional Filters #
If you need more filters, click Add Filter.
You can create additional filters using any of the supported types:
Tags
Product Type
Vendor
Price
3. Customize Filter Appearance #
To customize the design of your filters:
Go to: Rank King → Customization Settings → Edit Settings
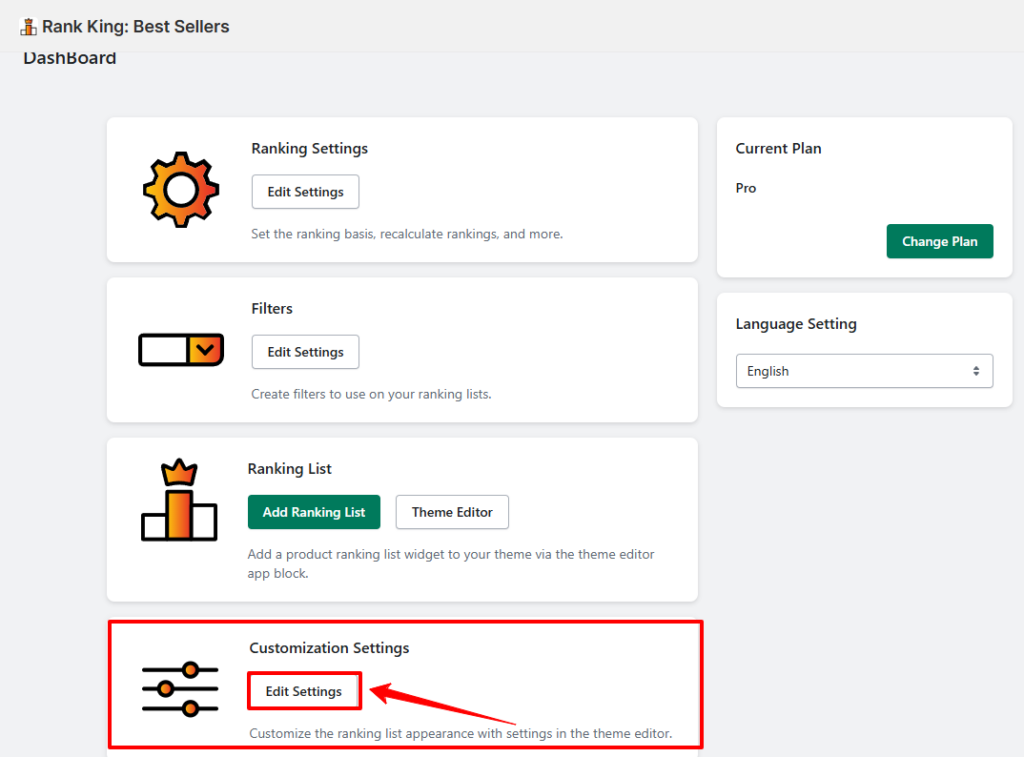
Then open: Shopify Theme Editor → Filter Settings
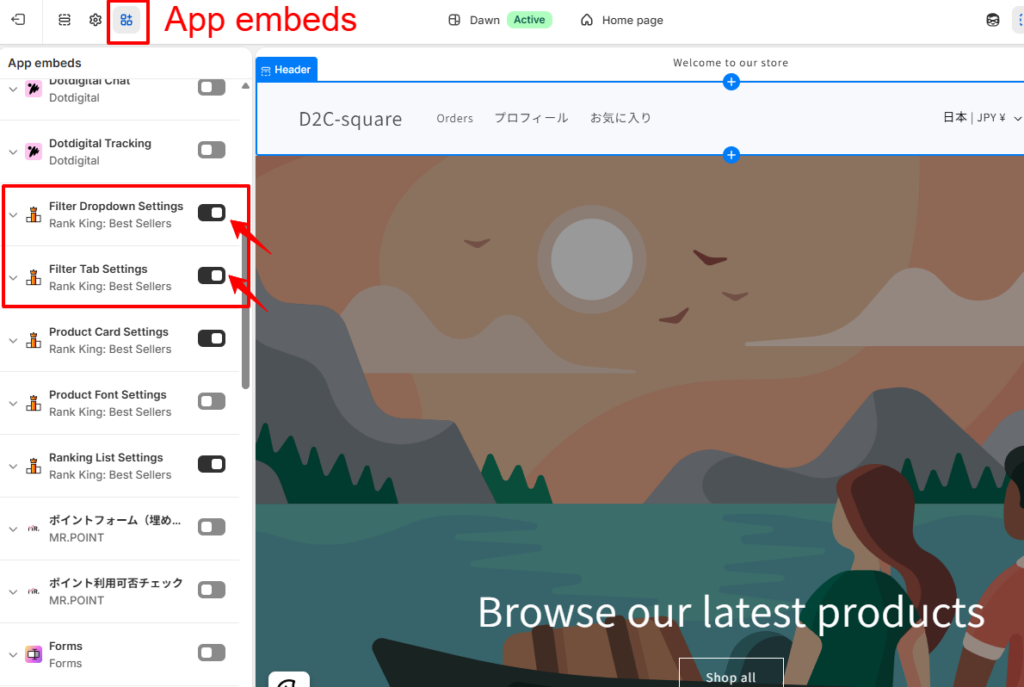
From there, you can customize various design options, including:
- Filter width
- Typography
- Colors
- Spacing
- Layout
To apply your custom filter design, make sure the Enable Filter Customization switch is turned On.


